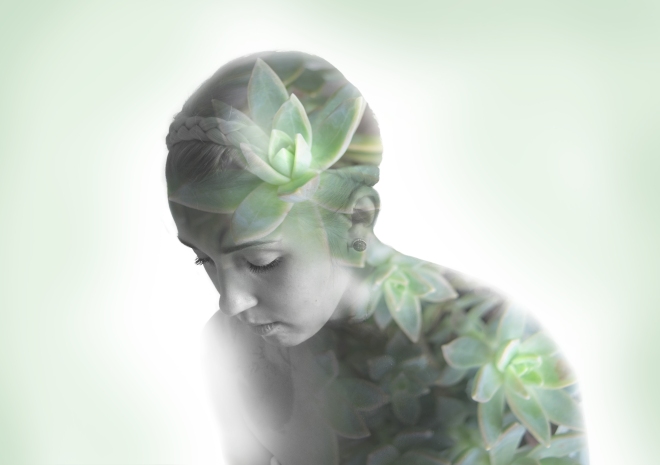
This is a technique that you can use in so many ways, once I learned how to create a double exposure it was useful to me in numerous projects. It can be tricky to get the hang of but once you’re more comfortable you can really get creative with double exposures and end up with a variety of unique and beautiful designs.
I first learned how to create a double exposure by watching numerous youtube videos, and scrolling threw few different online tutorials. There were a lot of steps in common but some tutorials I found used different technique than others which lead to some confusion. The problem with video tutorials is they often go by pretty fast, and unless you’re a photoshop wizard it can be easy to get lost. I’ve put together a tutorial with detailed steps along with screen shots so hopefully it is pretty easy to follow along!
REMOVING THE BACKDROP
One of the keys to a successful double exposure portrait is having an image with a crisp outline and clear background. A white backdrop is the easiest to remove. Start by opening both your portrait image and your landscape, pattern, texture or whatever image you want to combine with the portrait in photoshop.
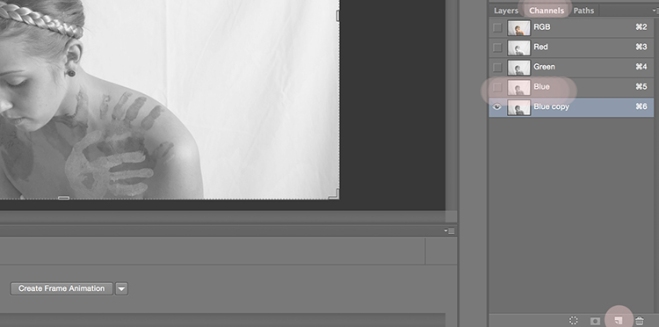
An easy way to remove the backdrop is by making the portrait outline crisp and easy to select. You can do this by creating a new channel. Open up your channels and find the channel with the most contrast and then duplicate it by clicking and dragging it down to the new layer icon.
The next step is to adjust your levels. Open up your levels by clicking “image” in your top menu, followed by adjustments and levels.

Your levels window will open up above your image. The purpose of this step is to darken the image, which will further separate it from the white background. Move the midtones and shadows sliders to the right to dramatically darken the image. Slide them to the right as far as you can without expanding the portraits black outline.

You may notice after adjusting your levels that there are still areas of highlights left on the portrait. You can use the paint brush to manually fill in these areas. Select the brush tool and set up a black brush with a hard tip and paint in the remaining highlights.

Currently the duplicated blue channel is still in view, click on the rgb channel and the image will return to it’s normal appearance (not the dark black portrait). Now you want to isolate the person from the background. First command and click on the duplicated blue channel (while the rgb channel is still selected) to load the selection.
You can see in my image below that the selection included part of the background as well, which you don’t want. If this is the case (if not, ignore this step) it’s an easy fix. You can use the lasso tool to fix the selection, but first in your top menu click select and inverse.

Now the background is selected instead of the portrait. With the lasso tool, and the “add to selection” icon selected in the top menu, move your mouse around any area of the background that didn’t get selected. Click select, and inverse again to make sure that the portrait is selected again instead of the background.

Return to the layers panel and make sure the background layer is selected. Hit command c, followed by command v on your keyboard to copy and paste the selection into a new layer. After you copy and paste the portrait selection should automatically appear in a new layer at the top of your layer stack with the background now transparent. It should look similar to the image below.
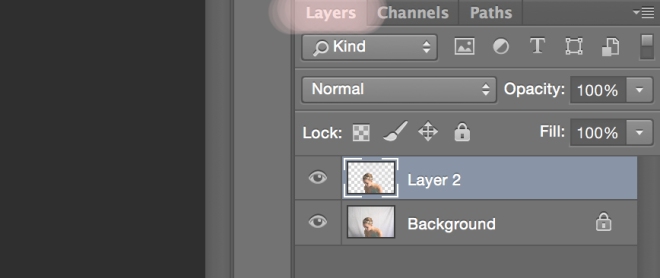
After you’ve isolated the portrait from the background, the original image is no longer necessary. The layer we started with will actually serve as the background now. Use the paint brush or paint bucket tool to fill the background with white.

ADD YOUR SECOND IMAGE
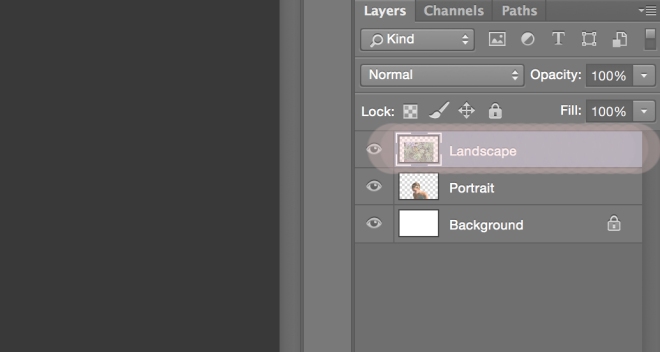
Open up the photoshop file with your landscape or whatever image you’re going to combine with the portrait. Select the entire image and drag it into your portrait photoshop document. Move your landscape image to the top of the layer stack. At this point I’ve renamed my layers accordingly to keep them organized. I renamed the layer with the duplicated selection I made of the portrait to “Portrait.”
CREATING A LAYER MASK
The next step is to create a layer mask on the landscape layer so that it only fills the portrait shape, and any other overlapping area is hidden. You can easily do this by hitting command and click on the thumbnail of the portrait layer, while the landscape layer is selected. You will see that the outline of the portrait now appears in a selection on the landscape layer.
With the landscape layer still selected, click on the create clipping mask icon. You’ll notice a new layer mask with the outline of the portrait. It should look something like the image below. You can unlink the layer mask and landscape icon by clicking the link icon between the thumbnail and clipping mask. This will allow you to move the landscape image within the mask.

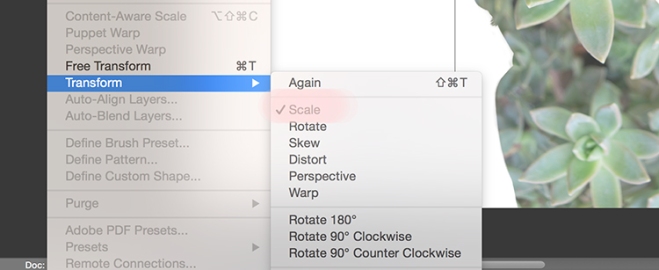
Now that they’re no longer linked, you can move the landscape image around to create the best composition within the clipping mask. With the landscape layer selected click edit, transform, and scale to move the landscape image freely.
CREATING THE DOUBLE EXPOSURE
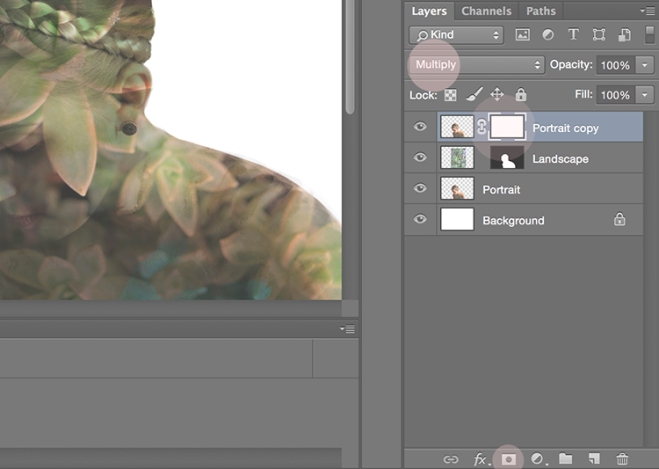
This step is where everything comes together and you’ll finally start to see the double exposure effect. Duplicate the portrait layer (the shortcut is command + j) and move it to the top of your layers. This effect often looks better if your portrait image is black and white, you can easily do so by clicking image, adjustments and desaturate.

Change the blending move to multiply (now you’ll see the double exposure) then apply a layer mask to the portrait copy.
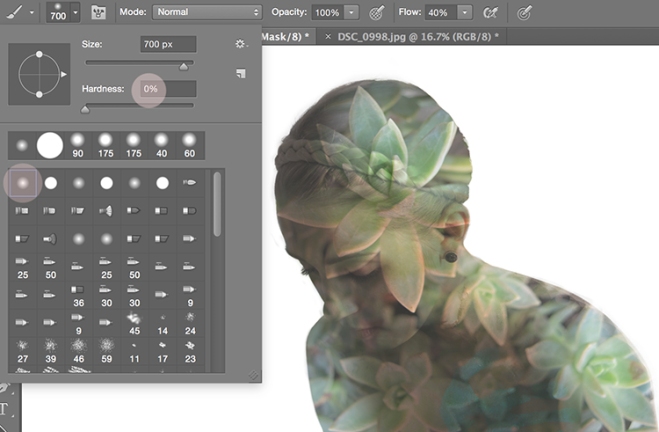
Pick a large, soft brush with a black fill, and with the layer mask selected, use it to erase away parts of the portrait where you want more of the landscape to show.
To do the opposite, and make areas of the face more prominent, work on the layer mask of the landscape layer. Switch to a white filled brush and erase away areas of the landscape to bring more of the face into focus.
This step will involve more experimenting, you can switch back and forth between the two layers until you’re left with an effect you’re happy with!
I hope you enjoyed this tutorial! I also have a tutorial available for transferring artwork to digital in photoshop. Feel free to share any comments or questions in the comment section below. Any suggestions for my next tutorial?
Thanks for reading!
